Hallberg 29 mainsail traveller renewal | grootschoot overloop vernieuwen
The HR 29 is originally fitted wit a Pfeiffer size II system. Mine lasted for 38 years now, but the thing was just worn out a little. Still functioning though.
 |
| the old Pfeiffer system 2 |
 |
| Worn traveller parts |
How it started
To be honest, it started with searching for a small leak under the front seating. As you may know, I've renewed the full cockpit teak in 2018. I then already discovered that the shape of the hull beneath the front seat isn't great. Mine is from 1983, from the first series (I don't know if these are called mark I..?). Water is not draining there sufficiently, so there is often a little water standing there. It gets muddy over the years a little. When renewing the seats, I used Sikaflex to close all the small holes. Beginners mistake.. One tiny spot was leaking last seasons. And I don't like those drops on my spiffy upholstery!
So a took the seat off, which wasn't too easy. It was really fitted well if I may say so :-)
 |
| ceiling Hallberg 29 |
On one side, the ceiling piece caught some water. But still in good shape. I made it watertight with epoxy.
Ordering parts
After some looking around, and studying the Pfeiffer catalogue , I had found the rights parts to order.
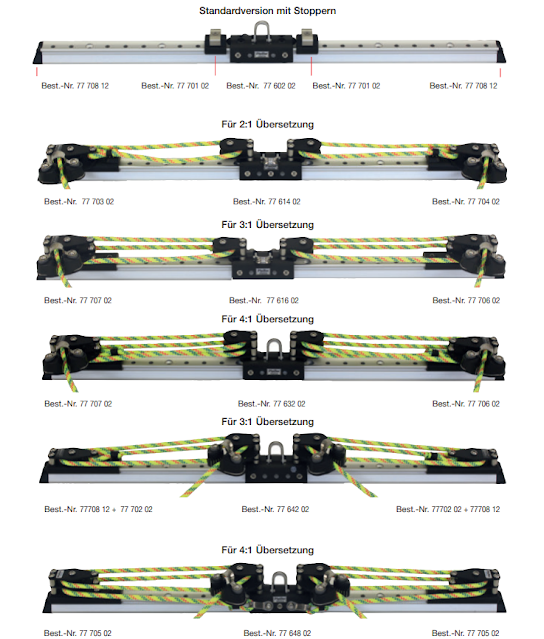
You can choose for a 2:1 or 3:1 or even 4:1 drive. The original one had none. I went for the 3:1 system, helping already a lot and not getting too high above the seats.
These are the parts numbers I have used:
7761502 traveller
7770602 controller right
7770702 controller left
7460201 rails
I have ordered in Germany at Segelladen who have a really displayed all parts well.
Putting it together
After taking of the seating, I first had to repair all holes and spots. Drilling them, countersinking and then filling with West Epoxy 105/205 and a little high density filler.
 |
| filling old holes with epoxy |
After that, I could replace the seating and check whether the new system would fit. Well, it didn't fit quite nicely. The traveller would only just fit under the seat, but the controllers wouldn't. The best solution was to lower the teak beam under it by 15 mm. So I did. Using a milling machine and chisel. It took me about three hours to get it in the right and flat shape.
Maybe you're asking yourself: why didn't he take of the beam?? I would have if it were possible. But it is bolted from the inside, and the bolts are hidden behind the interior parts.
 |
| lowering the teak beam |
Under the beam, there is a metal piece. So the whole construction would still be sturdy after taking a piece of wood off.
Of course, replacing it with the same systems has it advantages. The holes for the bolts were in the right place. I ordered some new stainless 316 bolts and nuts, and mounted it with tef gel to prevent corrosion.
On the front side, I replaced the teak. A piece had broken off over the years apparently. But it covers the bolts an metal strip, so I made a new one.
 |
| old teak lining |
 |
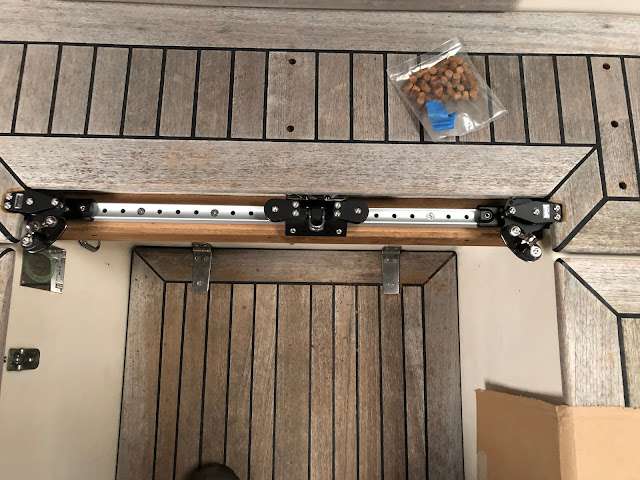
| new mainsheet traveller system in place |
I will add some pictures of the new traveller in working condition. But job done for now, and soon she's ready to be launched for an new season.
 |
| the new traveller installed on my Hallberg 29 |
Added in May:
it's really a joy to work with the new Pfeiffer traveller 3:1. It works very well when tacking, even in strong winds. Happy with this job!
Go to the next post.


Reacties
Een reactie posten